August 21, 2024
Demystifying Azure Functions: How to Implement Serverless in Practice
To better understand Azure Functions, let's take a small step back. What comes to mind when you hear the word Serverless?
Demystifying Azure Functions: How to implement serverless in practice
To better understand Azure Functions, let’s take a small step back. I promise it will be brief!
What comes to mind when you hear the word “Serverless”? No servers? Fewer servers?
Although the name “Serverless” may suggest the absence of servers, in practice, servers are still present. However, routine and essential tasks, such as server provisioning, operating system management, security updates, scaling, load balancing, log generation, and monitoring, are managed by the cloud provider.
Serverless is a cloud architecture model where the cloud provider (AWS, Azure, Google Cloud, OCI, …) is responsible for managing servers, that is, the infrastructure necessary for your application to function.
When we seek to better understand Azure Functions, we notice that it is Microsoft’s implementation of the Serverless model, becoming an FaaS (Function as a Service) model, a cloud computing model that allows developers to deploy and execute “small pieces of code”, individual functions in response to specific events.
Some examples of well-known FaaS are:
- IBM Cloud Functions
- Amazon’s AWS Lambda
- Google Cloud Functions
- Microsoft Azure Functions
In this article we will understand in theory and in practice how to implement and run Azure Functions locally. For this, let’s analyze some key characteristics of Azure Functions, they are:
On-demand execution: functions are executed from a “trigger” event, we will address the types of available triggers further ahead. This means that the code is only executed when needed, resulting in greater efficiency and lower cost.
Support for multiple languages: C#, JavaScript, Python, Java, and PowerShell. These are languages supported by functions, allowing developers to use the languages they are most comfortable with.
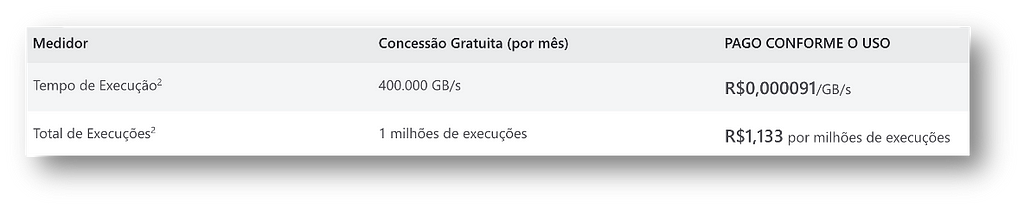
Pay-per-use payment model: you only pay for the execution time of your code and the resources consumed during that execution. There are no costs for the time when the function is not active.
Integration with the Azure ecosystem: functions integrate easily with other Azure services, such as Azure Blob Storage, Azure Cosmos DB, and much more. A standout point is that functions are already integrated with Azure Monitor and Azure Application Insights.
Agile development and deployment: functions can be developed and deployed quickly using tools like Visual Studio, Visual Studio Code, or directly through the Azure portal. The Azure Functions Core Tools allows you to develop and test functions on your local computer, a tool which we will use in practice.
Okay, but now what?
We know that functions are executed from an event, a trigger, which we will refer to by the name of trigger, consequently with this trigger being fired, the code is executed and an output is generated.
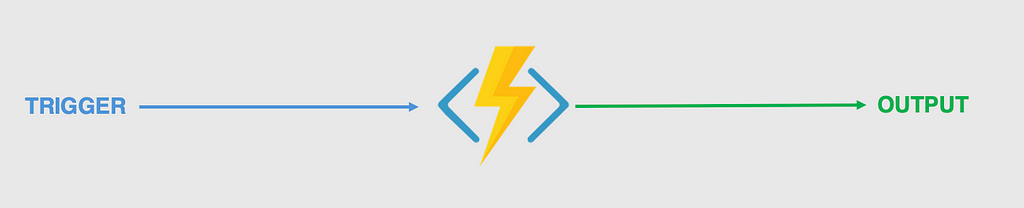
Microsoft provides various types of triggers and bindings. Some triggers such as: HTTP Trigger, Timer Trigger, and Blob Trigger.
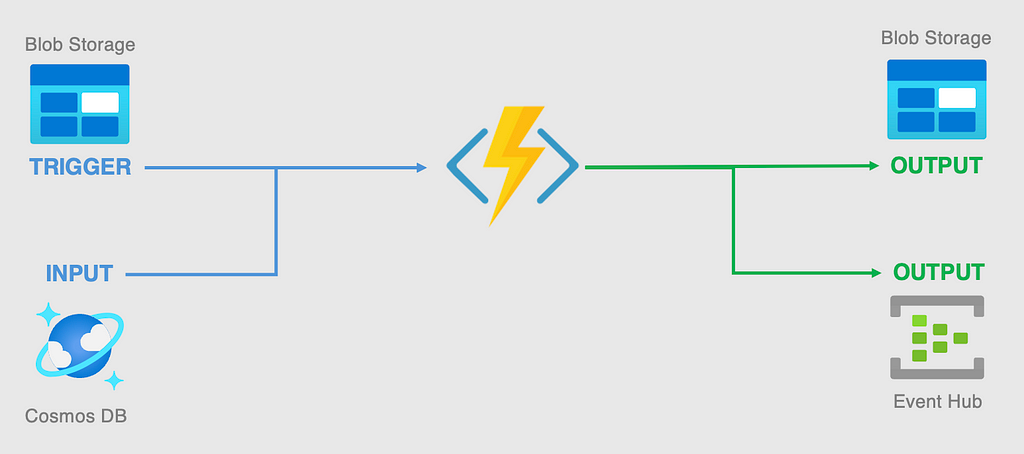
As we will see in the following image, Azure Functions support the concept of bindings, which connect the function to other Azure resources or services without the need to write much code. These bindings allow you to read or write data from/to Azure services. There are two main types of bindings:
Input Bindings: Bring data into the function. For example, reading data from a blob or from Cosmos DB.
Output Bindings: Send data from within the function to another service. For example, sending a message to Event Hub or writing to a Cosmos DB table.
We know that technologies evolve quickly and we may have new versions, or even discontinuations of others, so I’ll leave below the official Microsoft link regarding the types of triggers and bindings.
Triggers and bindings in Azure Functions
Without further ado, let’s get to practice.
We will use the Azure Functions Core Tools, it’s worth remembering that the commands used are the same for all operating systems except for the way to install this package.
I’m using macOS with brew, for this you just need to run the following command:
brew tap azure/functions
brew install azure-functions-core-tools@4
After successful installation, let’s create our project:
func init MyFuncProjFolder \
  --worker-runtime dotnet-isolated \  # indicates to isolate the function execution in its own process.
  --target-framework net8.0           # version of the .NET framework that will be used in the project.
Project structure created by the func init command
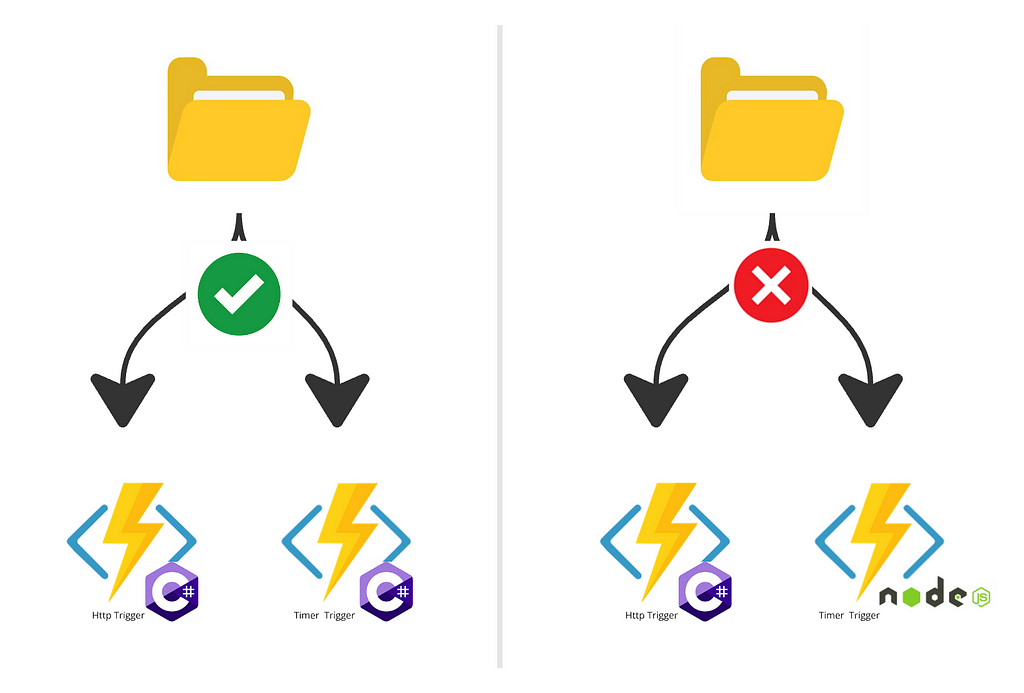
We notice that the project structure was created, but not a function itself. But how is that? Simple, we only created a project, this project can contain several functions, where they can be of different types of triggers, but only of one technology.
Confused? See the image below:
Next step, creating our first function:
cd MyFuncProjFolder

func new \
  --template "Http Trigger" \  # type of trigger the function will use
  --name HttpTriggerExample \  # name of the function
  --authlevel "anonymous"      # authentication level required to access the function via HTTP.
To run the function locally and ensure its operation, just run the following command:
func start # will start all functions existing in the project.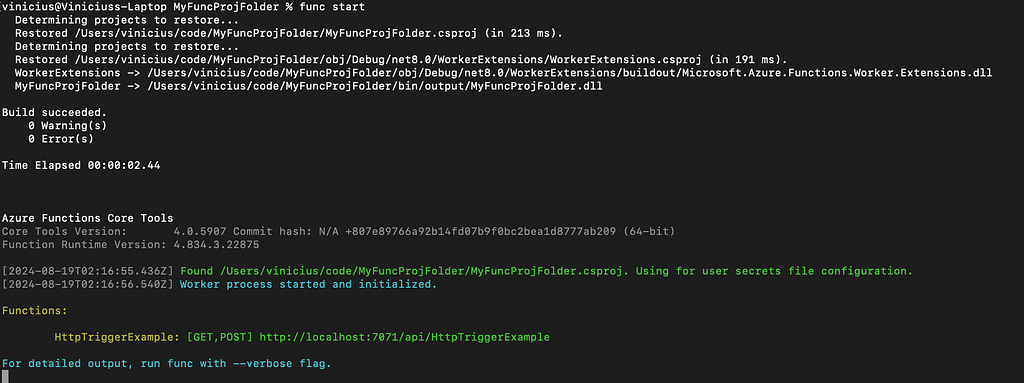

Excellent!! We have our first function.
To finish this first post, let’s create a new function, to see how it’s possible to have two functions in our MyFuncProjFolder project, this time we will create with Timer Trigger.
func new \
  --template "Timer Trigger" \  # type of trigger the function will use
  --name TimerTriggerExample    # name of the function
The file of our function, TimerTriggerExample.cs, was generated.

When running the project, a connection error is presented.
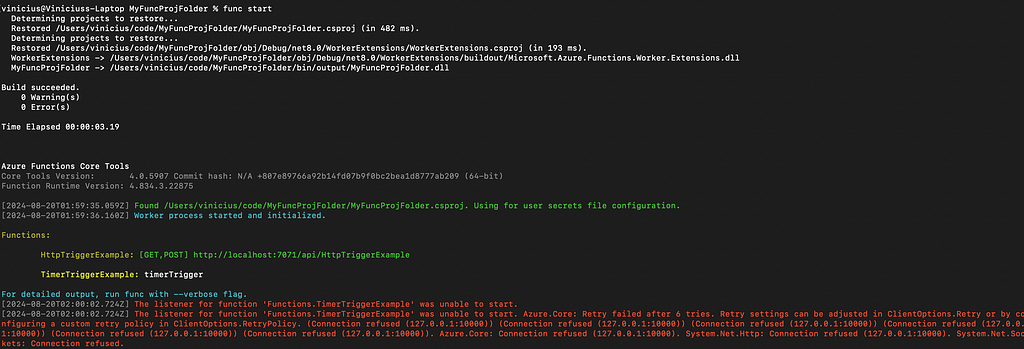
This error is related to the function’s inability to connect to the storage service necessary for the Timer Trigger to function. Specifically, the function is trying to connect to a local service (127.0.0.1) on port 10000, but the connection is being refused. This usually happens when the storage emulator (Azurite or Azure Storage Emulator) is not running or properly configured.
A question that may exist is why do I need a storage emulator for my function triggered by a Timer Trigger, that is, why does Azure Functions need a storage account?
Azure Functions uses a storage account to record logs, maintain the state of executions, and temporarily store data that may be needed during function execution. Even for a function that is triggered by a Timer Trigger, the service needs to store information such as the timer schedule, execution records, and data related to the function.
Another important point is, imagine that the function fails, or the service was restarted, it’s essential that the schedule is respected, resuming from where it left off, for this the Timer Trigger uses Azure Storage to persist the state of the schedule.
npm install -g azurite # installs azurite
azurite               # runs azurite
Check if the local.settings.json file is configured to use Azurite as the local storage service:
{
  "IsEncrypted": false,
  "Values": {
    "AzureWebJobsStorage": "UseDevelopmentStorage=true",
    "FUNCTIONS_WORKER_RUNTIME": "dotnet-isolated"
  }
}
Now, when running the project successfully, we will be able to view the logs generated by our TimerTriggerExample function.
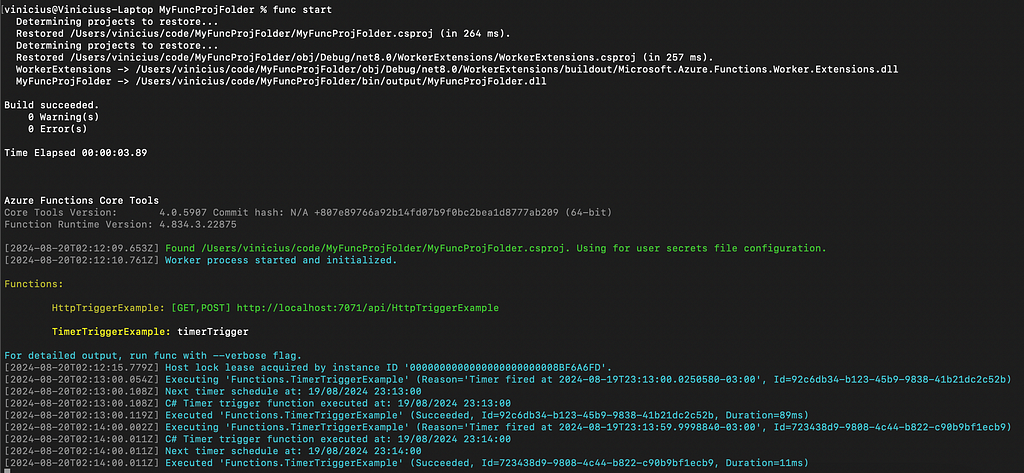
I hope I’ve contributed to your knowledge and demystified a bit about the implementation of Microsoft’s serverless model, Azure Functions. 🙌
Originally published on Medium.